
Deploy images – Deploy and upgrade operating systems
Deploy images
After you’ve completed the process of creating and configuring your task sequences, you’re ready to deploy your images. All you need to do is start the required computers, and they should start up using the MDT PE. Then use the following procedure to apply the image and deploy Windows 10. Note that steps might vary based on your specific configuration options:
- Turn on your target computer.
- The Microsoft Deployment Toolkit deployment wizard starts.
- As displayed in Figure 1-14, select Run the Deployment Wizard to install a new Operating System.
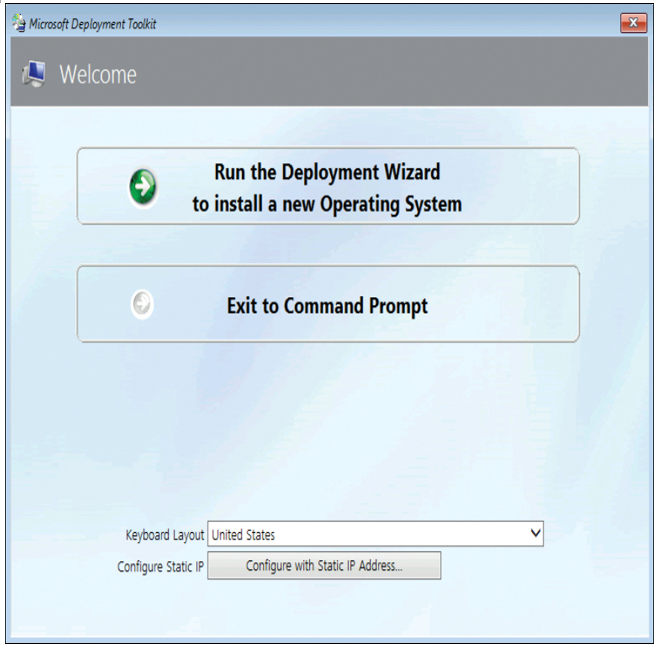
Figure 1-14 Deploying Windows 10 using an MDT task sequence
- Enter your User name, Password, and Domain and select OK.
- On the Task Sequence page, select the appropriate task sequence and select Next.
- On the Computer Details page, review the generated computer name, and then select either Join a domain or Join a workgroup. For the domain option, enter the Domain to join, Organizational Unit, and credentials to join (User Name, Password, and Domain). Select Next.
- Complete the Windows Deployment Wizard by entering the following information:
- Choose whether to move user data and settings from a previous version of Windows.
- Choose whether to restore user data.
- Specify the Language Settings and Time Settings.
- Select any apps you want to deploy.
8. When you’ve completed the required settings, select Begin. Your operating system and selected apps are deployed.
Need More Review? Deploy a Windows 10 Image Using MDT
To review further details about deploying images with MDT, refer to the Microsoft website at https://docs.microsoft.com/windows/deployment/deploy-windows-mdt/deploy-a-windows-10-image-using-mdt.